Is your Gmail inbox a chaotic mess? Do important emails get lost in a sea of newsletters and notifications? It’s time to take control! This guide will walk you through the powerful features of Gmail filters, labels, and automated rules, transforming your inbox from a source of stress into a streamlined productivity hub.
Why Bother? The Power of an Organized Inbox
Imagine this:
- Important emails: Instantly flagged and prioritized.
- Newsletters: Neatly tucked away for later reading.
- Social media notifications: Sent directly to a dedicated folder.
- Less time sorting: More time doing what matters.
This isn’t a dream! With Gmail’s built-in tools, it’s easily achievable. Let’s dive in!
Step 1: Understanding the Core Concepts
Before we get our hands dirty, let’s clarify what each tool does:
- Labels: Think of these as super-powered folders. An email can have multiple labels, making it incredibly flexible for organization. Instead of moving an email to a folder, you’re tagging it.
- Filters: These are the “rules” that automate actions on your incoming emails. A filter looks for specific criteria (e.g., sender, subject, keywords) and then performs an action (e.g., apply a label, archive, delete, mark as read).
- Automated Rules: This is essentially what a filter creates – an automated process based on your defined criteria.
Step 2: Creating Your First Label
Labels are the foundation of a well-organized inbox.
- Go to Gmail: Open your Gmail inbox.
- Click the “Create new label” button: On the left sidebar, scroll down until you see “More,” then click it to expand the options. You’ll find “Create new label” there.
- Name your label: Choose something descriptive, like “Newsletters,” “Work Projects,” “Family,” or “Receipts.”
- Click “Create.”
You’ll now see your new label in the left sidebar. You can even nest labels within each other to create a hierarchical structure (e.g., “Work/Project X,” “Work/Meetings”).
Here’s an example of what your labels might look like in the sidebar:
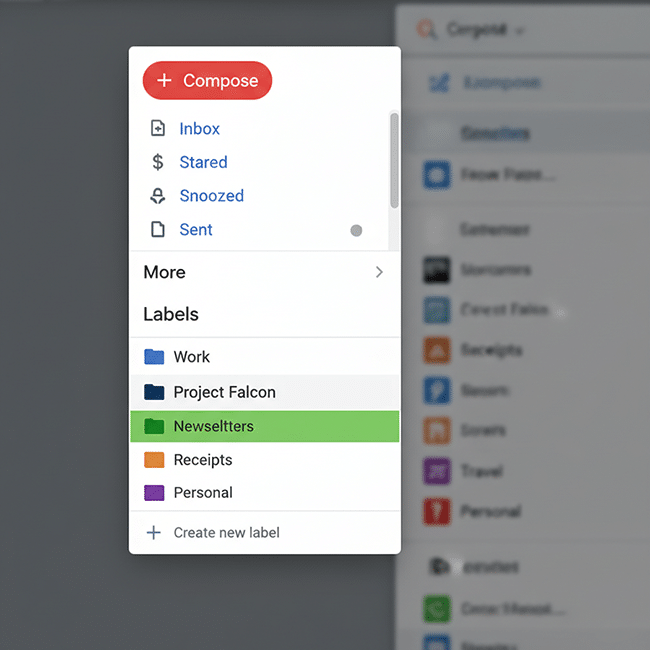
Step 3: Manually Applying Labels to Emails
To get a feel for labels, try applying one to an existing email:
- Select one or more emails: Check the box next to the emails you want to label.
- Click the “Labels” icon: It looks like a tag (or a square with a triangle missing from the bottom right).
- Choose your label: Select the label you want to apply from the dropdown menu. You can also create a new one here.
- Click “Apply.”
You’ll now see the label next to the subject line of the email.
Step 4: Creating Your First Filter (Automated Rule)
Now for the real magic! Let’s create a filter to automatically label all emails from a specific sender.
Method A: From an Existing Email (Easiest Way to Start)
- Open an email from the sender you want to filter (e.g., a newsletter).
- Click the “More” (three vertical dots) icon next to the reply arrow at the top right of the email.
- Select “Filter messages like this.”
- Gmail will pre-fill the “From” field with the sender’s email address.
- Click “Create filter.”
Method B: From the Search Bar (More Control)
- Click the “Show search options” down arrow in the Gmail search bar at the top of your screen.
- Fill in your criteria:
- From: The sender’s email address (e.g.,
[email protected]) - To: Your email address (if you want to be specific)
- Subject: Keywords in the subject line
- Has the words: Any words in the body of the email
- Doesn’t have: Exclude emails with certain words
- Has attachment: Filter emails with attachments
- Size: Filter by email size
- Date within: Filter by date range
- From: The sender’s email address (e.g.,
- Click “Create filter.”
Here’s what the filter creation window looks like: `
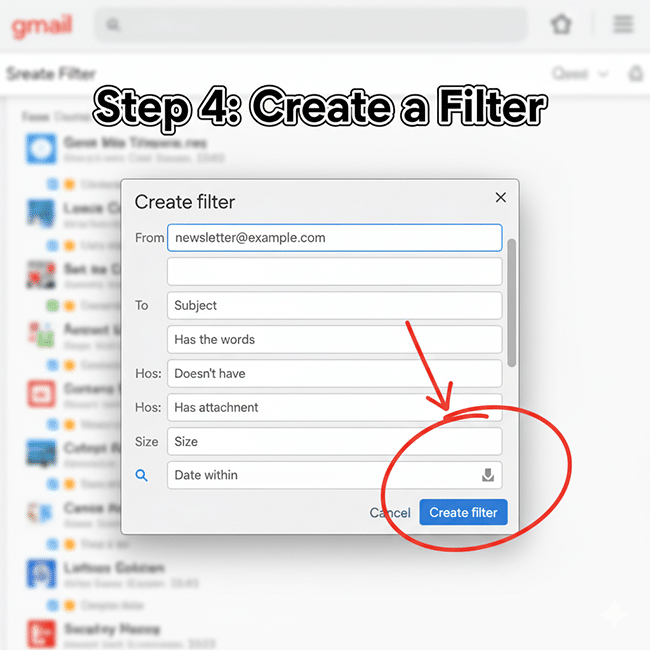
Step 5: Defining the Filter Actions
After clicking “Create filter” in Step 4, you’ll see a list of actions. This is where you tell Gmail what to do with the emails that match your criteria.
For our newsletter example, let’s say we want to:
- Skip the Inbox (Archive it): This prevents the email from appearing in your main inbox. It will still be accessible under its label.
- Apply the label “Newsletters”: So you can easily find them later.
- Mark as read: If you don’t need to be notified about them.
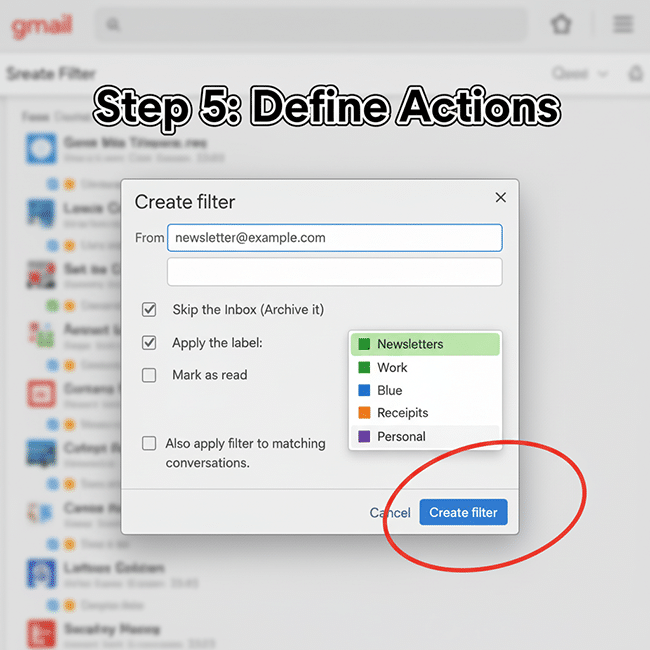
Here’s how to set those actions:
- Check “Skip the Inbox (Archive it).”
- Check “Apply the label,” then choose your “Newsletters” label from the dropdown.
- (Optional) Check “Mark as read.”
- (Crucial!) Check “Also apply filter to matching conversations.” This will apply the filter to all existing emails in your inbox that match the criteria, not just future ones.
- Click “Create filter.”
And voilà! All future emails from that sender will bypass your inbox, be labeled “Newsletters,” and be marked as read. You can find them anytime by clicking on your “Newsletters” label in the left sidebar.
This is what the action selection window looks like:

Dexter is a seasoned system engineer with a passion for all things tech. His analytical mind thrives on solving complex problems, whether it’s optimizing code or configuring Linux servers. When he’s not immersed in work, you’ll find Dexter gaming, exploring anime and manga, and staying up-to-date with the latest tech trends. His life motto? “In code we trust.”